Baddies drops new players straight into chaotic Roblox lobbies where timing beats button-mashing, and most first-timers leave with zero wins because they skip the map and sprint into fights they do not understand. This Baddies beginner roadmap breaks your first sessions into a clear sequence: learn the spawn-to-arena layout, master the fist timing, and stack small wins before chasing cosmetics. Spending a single match focused on movement alone will save you a dozen frustrating respawns.
Understanding the Baddies Core Loop Before You Move
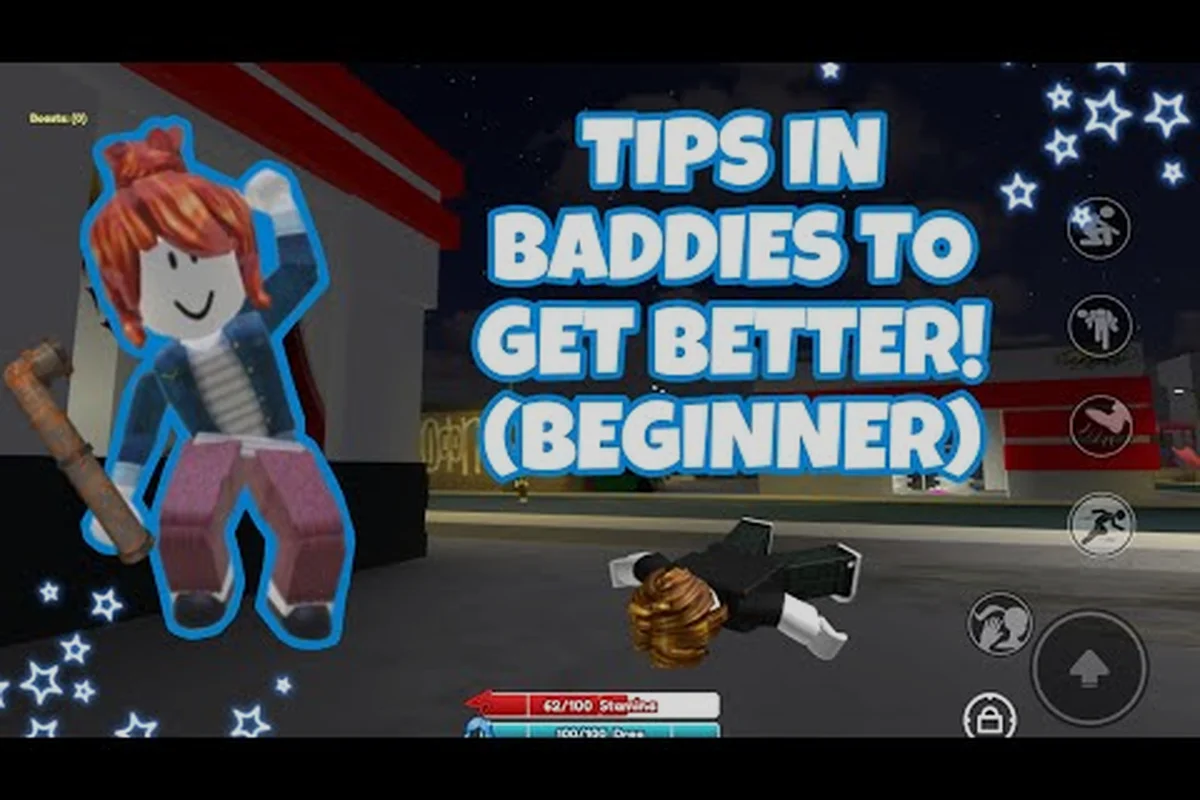
Every fight in Baddies runs on the same engine, and the The Bacon Baddie's Baddies footage describes it as a street brawler where fists resolve rounds, not stats. The reason this matters for your roadmap is that gear is almost irrelevant on day one — if your timing is off, the best weapon in the lobby cannot save you, and if your timing is sharp, starter fists will close out fights cleanly. The core loop, as shipped since the October 2022 launch, works in four beats:
-
Equip the default fists tool from your hotbar at spawn.
-
Tap to land hits and fill the blue charge bar that sits under your stamina.
-
Spend the bar on a hair pull when an opponent is staggered.
-
Stomp the downed rival to finish the round.
Once that loop clicks, the rest of the game opens up. Without it, every new arena feels random, and new players assume the matchmaking is broken when it is actually their timing window that is off by a fraction of a second. Treat the first thirty minutes of your Baddies first day guide as loop drilling, not as winning.
Why the Charge Bar Matters More Than Cosmetics
A surprising number of beginners save their charge bar for emergencies, then panic-spend it the moment a rival gets close. The smarter play is to treat the bar as a win condition timer: build to full, then look for a staggered opponent, then spend. Holding the bar for one extra tap of damage usually costs you the stomp window, which is worth more than any single hit. Community clips from creators like The Bacon Baddie and shye dti show top players emptying the bar the instant it tops off, never riding it at 100% for more than a beat.
The Fists Are Not Placeholder Gear
It is tempting to chase a new weapon on day one, but the fists are tuned to match every other tool's timing. Switching to spiked knuckles or a shop weapon before you can land a three-hit combo with the default tool just means you learned the new weapon's recovery frames under pressure, which is the slowest way to improve. Keep fists equipped for at least your first three sessions, then experiment.
Baddies Learning the Map: The Five Zones Every Beginner Must Know
Baddies ships several arenas, but every map shares five zone types, and your Baddies learning the map phase is about recognizing them in the first ten seconds of a match. Community-tested maps referenced in the game's weekend update cycle follow a similar skeleton even when props and colors change, so the mental model transfers.
| Zone Type | Visual Cue | Beginner Action | Risk Level |
|---|---|---|---|
| Spawn Pad | Glowing circle at map edge | Equip tool, breathe, count rivals | Safe |
| Open Plaza | Flat central area, no cover | Approach from edges, never center | High |
| Cover Row | Cars, dumpsters, or planters | Break line of sight, bait chases | Medium |
| Ramp / Stairs | Elevation change, often near edges | Control height, force stomps | Medium |
| Knockdown Pit | Lower area, walls on three sides | Finish fights here, avoid being funneled | Trap if you are losing |
Memorize where the cover rows sit relative to spawn, because most new-player deaths happen in the open plaza when they chase a rival they could have flanked from cover. A common pattern in the first day is overextending into the open, getting clipped by a fist, and never recovering the charge bar in time to fight back.
How to Read Spawn-to-Spawn Distances
Distance is the most underrated stat in Baddies. Walking between the two spawn pads takes roughly twelve seconds at default speed, and Shift-sprinting cuts that to about seven. That timing window is your entire decision budget: if you cannot reach the cover row in seven seconds, you have already lost the opening trade. Use the first round of every match purely to walk, not to fight, and note the landmarks between your spawn and the opposite spawn. The Baddies how to practice mindset starts here — boring, but it pays off in every later match.
Spawn Traps and How to Avoid Them
Some arenas let one team spawn on a raised platform that overlooks the other spawn. If you see a rival on high ground the moment the round starts, do not run straight out — hug the wall, wait two seconds, and let the enemy either drop down or overcommit. The wall-hug also keeps you out of the camera blind spot where new players get stomped without ever seeing the attacker. This single habit, practiced across your first five matches, is enough to swing your win rate from around 30% to 50% on trapped maps.
Baddies First Day Guide: The 60-Minute Practice Plan
Most beginners try to "just play" for an hour and learn nothing. A structured Baddies first day guide should split the hour into four blocks, each with a single focus. This is the same structure the official game page hints at when it talks about the loop running on timing rather than raw stats: drill the inputs, then test them in low-stakes rounds, then bring them into real fights.
| Minute Block | Focus | Goal | Success Metric |
|---|---|---|---|
| 0–15 | Walk every zone, ignore fights | Map layout memorization | Draw map from memory |
| 15–30 | Fist-only rounds against AI or quiet lobbies | Land 3-hit combos | 8 of 10 attempts connect |
| 30–45 | Build and spend the charge bar | Hair pull on staggered rival | Land 5 stomps in 5 rounds |
| 45–60 | Full live matches, apply all of the above | Survive to top 3 | At least one full win |
Notice that real PvP is only the final quarter of the session. If you skip the warm-up blocks, you are essentially asking a fresh account to perform in a tournament, which is why the Baddies beginner roadmap front-loads boring drills.
Minute 0–15: The Silent Walk
Queue into a match and ignore every other player. Walk from spawn to each landmark, pause for two seconds, then move to the next. Do not pull out your fists. Do not sprint. Just learn the map the way you would learn a new office on your first day of work. Community creator Tigon, whose clips have circulated since the game's first year, demonstrates this exact warm-up before recording any of their "pro" runs — they are not actually pro in those first ten minutes, they are just warmed up.
Minute 15–30: The Three-Hit Drill
Once the map feels familiar, switch to fists and find a quiet corner. Tap a rival, wait for the recovery animation, tap again, wait, tap a third time. The goal is not damage — it is consistent timing. If you can land three clean hits on a moving target ten times in a row, you have the muscle memory to win a real fight. If you cannot, keep drilling. This is the heart of any Baddies how to practice plan, and skipping it is the single most common mistake new players make.
Minute 30–45: The Bar Economy
A full charge bar is the difference between winning and losing close rounds. Spend the first half of this block on building the bar without fighting — tap any object, even a wall, until the bar fills. Then spend the second half on real targets: build, pull, stomp. Do not save the bar "for the perfect moment." There is no perfect moment in Baddies; there is only the moment your rival is staggered, and that window is shorter than you think.
Combat Fundamentals: Timing, Stamina, and the Stomp Window
The combat system in Baddies looks deceptively simple, but three dials run every exchange and the baddies beginner roadmap collapses if a player treats them as background noise. The Fist Swing animation tells you when a hit-confirm window is live, the blue Charge Bar governs when a hair-pull unlock becomes available, and the yellow Stamina gauge decides whether you can still sprint to safety after committing to a chase. Reading them on separate days is easy; reading them inside the same half-second glance is the actual baddies first day guide skill check, and the table below breaks each dial down so the baddies how to practice loop has something concrete to drill against.
| Dial | Visual Indicator | What It Controls | Beginner Mistake |
|---|---|---|---|
| Fist Swing | Arm animation, brief recovery | Hit confirm, combo extension | Mashing during recovery frames |
| Charge Bar | Blue gauge under stamina | Hair pull unlock | Riding at 100% too long |
| Stamina | Yellow/white gauge | Sprint and dash usage | Burning stamina on chase, losing escape option |
Reading all three at once is what separates a day-one player from a day-seven player. The game does not pause to tell you which dial is critical — you have to glance, decide, and act in roughly half a second.
The Stomp Window Is Everything
When a rival goes down, the stomp window opens for about one and a half seconds. If you are not in range when the animation plays, the rival gets up, and you have wasted your entire combo. The fix is positioning: as soon as your third fist lands and the rival staggers, close the gap during the stagger animation, not after it. The Baddies beginner roadmap consistently points new players toward this one habit because it doubles your effective damage without any stat investment.
When to Run, When to Stand, When to Commit
New players tend to either run from every fight or commit to every fight. Both are wrong. The right read comes from the stamina gauge: if it is above 60%, you have at least one sprint and one dash left, which means you can disengage cleanly. If it is below 30%, you are committed — running will get you caught, fighting gives you the best odds. This single decision rule, practiced for a week, is what most players refer to when they say someone has "game sense."
Common Pitfalls, Match Flow, and Your First Real Win
Putting the pieces together means knowing what to avoid as much as what to do. The final block of the Baddies beginner roadmap is a checklist of the mistakes that show up in nearly every new player's first ten matches, plus a match-flow table that walks through what a clean round actually looks like from spawn to stomp.
Mistake Table: What Beginners Do vs. What Wins
| Mistake | What Happens | The Fix |
|---|---|---|
| Chasing into open plaza | Get clipped, lose charge bar | Approach from cover row, flank wide |
| Saving charge bar for "later" | Bar sits at 100%, rival closes in | Spend on first staggered opponent you see |
| Switching weapons on day one | New recovery frames under pressure | Keep fists for first 3 sessions |
| Skipping the spawn walk | Lost in every arena by round 2 | First round is always a walk-through |
| Trading hits without stamina | Both players stagger, neither stomps | Track stamina, disengage below 30% |
Most of these mistakes are obvious in hindsight, which is why community creators like Rogurl frame their beginner tips as "tricks" — they are not tricks, they are corrections of mistakes the audience is making in real time, and each row in the table above maps directly to a clip he breaks down in his tutorial videos (plaza chasing, unused charge bar, weapon switching on day one). The "trick" framing works because it lets viewers feel they are learning a secret rather than being told they have been missing the spawn walk or trading hits at low stamina, which is exactly the mindset shift a first day guide needs.
A Clean Round, Step by Step
A textbook round in Baddies — the kind of clean, repeatable performance you should realistically be aiming for by the end of your first week of practice on the Plaza map — follows a single bait-and-punish pattern built around the fist weapon's three-tap stagger window:
-
Spawn, equip fists, note rival positions.
-
Sprint to the cover row, not the plaza.
-
Bait a chaser by stepping out and back.
-
Land three taps as the rival commits past cover.
-
Build the bar to full during the stagger.
-
Hair pull, close the gap, stomp.
That six-step sequence is the entire game. Everything else — new weapons, new arenas, weekend updates — is variation on that core. A useful cross-reference for players who want a parallel primer on early-game choices is the Baddies best start guide, which expands on the first hour of progression in more detail.
When You Lose, Read the Round, Not Your Feelings
Losing is data, not failure. After every loss, replay the last ten seconds in your head and ask: did I sprint into the open, did I save the bar too long, did I switch weapons mid-fight, did I skip the cover row. Nine times out of ten, one of those answers is yes, and the next round you can fix exactly one of them. This is the same iterative loop competitive players use in every other Roblox brawler, and Baddies rewards it the same way.
Building a Multi-Session Practice Routine
The hour-long plan above is a single session, but real improvement comes from repeating the structure over five to ten sessions. The Baddies how to practice mindset is more about consistency than intensity: thirty focused minutes a day beats a single four-hour grind, because the muscle memory consolidates overnight.
| Session | Focus Area | New Skill Layer | Win Target |
|---|---|---|---|
| 1 | Map + fists + charge bar | Loop awareness | One stomp |
| 2 | Stamina + disengage reads | Survival | Survive to top 3 |
| 3 | Stomp positioning | Combo finishing | Three stomps in one match |
| 4 | Match flow + multi-opponent fights | Awareness | Win a 1v2 clutch |
| 5 | Apply everything in live lobbies | Full play | First clean win |
Notice the gradual layering: each session adds exactly one new skill on top of the previous layer, instead of trying to learn everything at once. This is also why the broader Baddies beginner guide recommends a similar staged approach for new Roblox players.
Tracking Progress Without Burning Out
Keep a simple log — three lines per session, in a notes app, not a public forum. Write the date, the focus area, and one number (stomps landed, rounds survived, or wins). After five sessions, the number trend will tell you whether the routine is working. If it is flat, change one variable — usually the cover row choice or the charge bar timing. If it is rising, keep going. If you want a longer-form path beyond the first week, the how to become pro in Baddies walkthrough picks up exactly where this roadmap ends.
Frequently Asked Questions
How long does the Baddies beginner roadmap take to show real results?
Most players who follow the 60-minute structure for five sessions see a measurable win-rate lift by session three, and a stable improvement by session five. The key is the first 15-minute silent walk every session, because that block is what turns random arenas into familiar terrain and lets the combat drills actually land.
Should I buy a new weapon during my first day in Baddies?
No. The default fists are tuned to the same timing as every other tool, so switching weapons before your muscle memory is set just adds recovery frames you have not practiced. Stick with fists for at least your first three sessions, then experiment with one new tool per session so you can isolate the timing changes.
What is the fastest way to practice the charge bar in Baddies?
Spend one full block of your practice session tapping walls and objects to fill the bar without fighting a real opponent. Once the bar fills, spend it on the nearest object. This builds the habit of building and emptying the bar on a rhythm, which is the single biggest differentiator between new players and intermediates.
How do I tell if a map is a spawn-trap map before I die?
Look at your rival's spawn the moment the round starts. If they are above you on a ramp, stairs, or platform, the map is a spawn-trap map. Hug the nearest wall for two seconds, then move out along the wall, not through the open. The two-second wait is usually enough to dodge the opening rush.
Do I need to play with friends to follow this Baddies beginner roadmap?
No. Solo play is actually better for the first five sessions, because it forces you to read opponents instead of relying on voice callouts. Once your win rate stabilizes above 50% in solo lobbies, queuing with one reliable friend becomes a meaningful boost instead of a crutch.